
Project
First ornament: a small geometric sampler
Stitch an original 26-by-26 geometric ornament with a printable chart, three-color key, exact stitch counts, and finishing handoff.
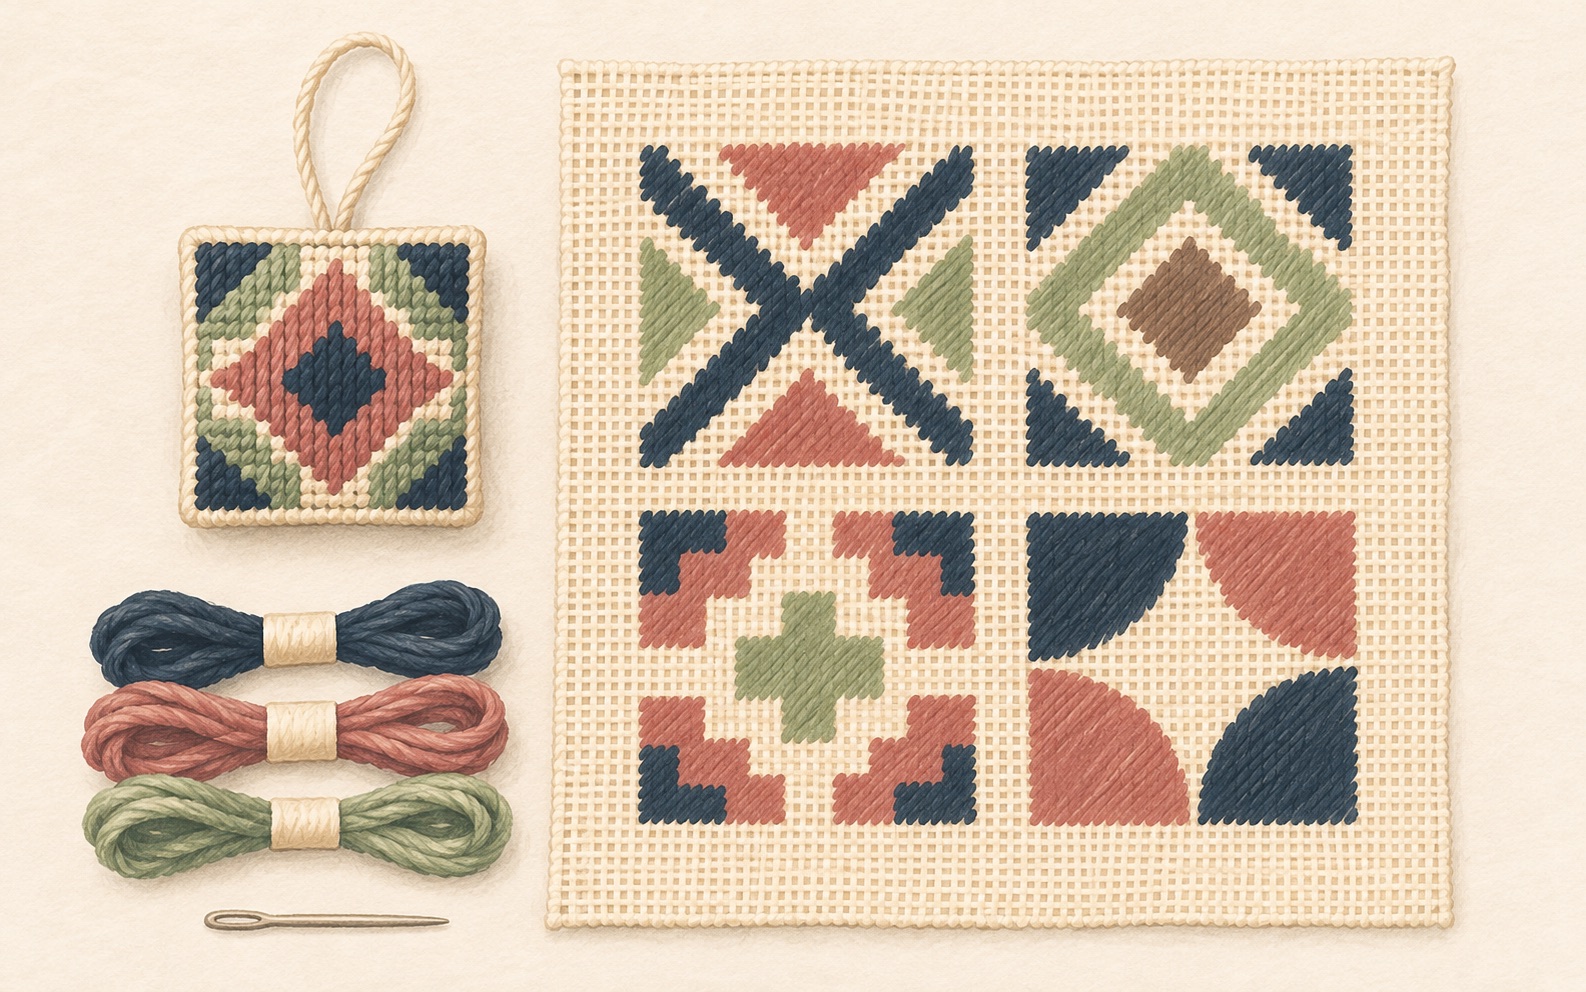
This small counted design has a two-row border and a central diamond. It uses 676 tent stitches and three colors. On 13 mesh the stitched square is nominally 2 × 2 inches; on 18 mesh the same chart is about 1.44 × 1.44 inches. The instructions below use 13 mesh and continental tent stitch.
Gather the materials
- One piece of 13-mesh mono canvas, 6 × 6 inches. Centering a 2-inch design leaves about 2 inches of margin on each side; confirm your finisher’s requirements before cutting.
- DMC Pearl Cotton size 3: one skein each in a dark border color, pale background, and contrasting diamond color. The chart uses A, B, and C, so you can select your own shades. Use one undivided length in the needle.
- A blunt tapestry needle that carries the thread through the canvas without forcing it, embroidery scissors, canvas-edge protection, and a suitable frame or stretcher bars if you use one.
- The printable chart below and a way to mark completed chart rows on a copy.
The thread setup follows Chelsea Needlepoint’s starting recommendation for pearl cotton size 3 on 13 mesh. Work a small scrap patch before committing to the main design. One skein per color is the supply allocation for this small exercise, not a measured consumption result. Keep unused thread for corrections. Do not use the same size-3 recommendation automatically on 18 mesh; the mesh guide explains the size change.
Read the chart
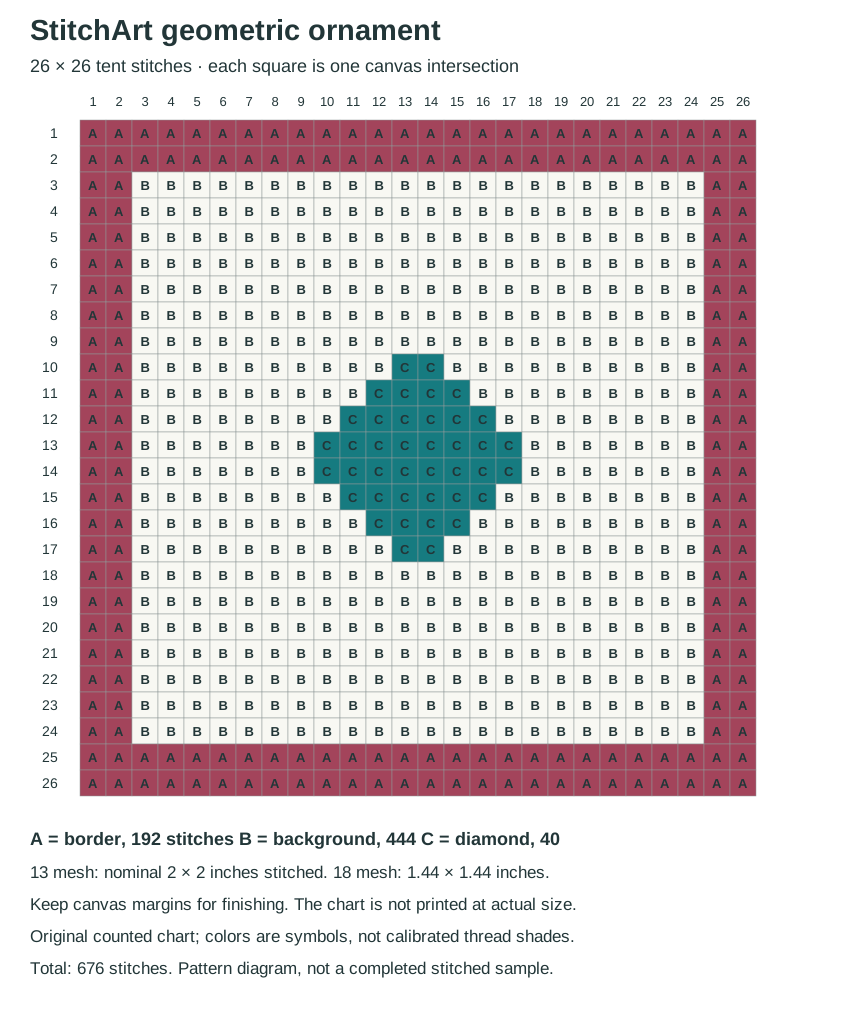
Open or download the full-size printable chart. Use the chart’s row and column numbers; printing scale does not change the stitch count.
| Symbol | Area | Stitches |
|---|---|---|
| A | Outer two rows/columns, including corners | 192 |
| B | Background inside the border, excluding the diamond | 444 |
| C | Central diamond | 40 |
| Total | 26 × 26 | 676 |
Rows and columns are numbered 1–26 from the upper left. The center falls between rows 13/14 and columns 13/14. The diamond occupies rows 10–17: its row widths are 2, 4, 6, 8, 8, 6, 4, 2. Each is centered between columns 13 and 14. This makes the chart easy to check without relying on color alone.
Stitch the diamond first
- Prepare the canvas edges. Find the midpoint of the available canvas and count outward to position the 26-by-26 square with the planned margins. The center is between four intersections, not on one stitch.
- Thread color C. Use an away knot outside the stitched square with enough tail to thread and secure later.
- Begin diamond row 10 at column 14 and work two continental stitches right to left: columns 14 and 13.
- On row 11, work columns 12–15 left to right. Continue alternating direction: row 12 columns 16–11; row 13 columns 10–17; row 14 columns 17–10; row 15 columns 11–16; row 16 columns 15–12; row 17 columns 13–14.
- Check the widths against the chart. Secure the ending beneath the reverse of the diamond; remove the temporary knot and bury its tail beneath existing stitches.
The continental lesson gives exact up/down movements and the return-row turn. Every front stitch in this ornament has the same slant. When a new row extends beyond the previous one, count from the chart’s fixed center; do not shift the entire diamond to make the edge convenient.
Add the border, then the background
Work A around the outside two rows and columns. Count 26 stitches across the top and bottom and check that the square remains 26 high. Each corner belongs to the border once; do not add extra corner stitches. You may end and restart on a new side rather than carry thread around an unstitched corner.
Fill B inside the border, stopping at the diamond. Work each contiguous row segment with continental. Where C interrupts a row, end or travel only beneath already stitched areas; avoid a long dark carry behind the pale background. Check that all 444 background intersections are filled and the C outline remains centered.
Prepare the ornament finish
Inspect front and reverse for missing stitches, loose loops, temporary knots, and unsecured tails. Photograph the work with a ruler. Keep all margins intact and send the finisher the 2-inch stitched dimensions, intended square ornament shape, thread type, preferred backing, and hanging-loop choice. Ask the finisher to confirm any blocking or extra edge rows before you alter the canvas.
This is a counted stitching project with a professional-finishing handoff, not a sewn ornament-construction tutorial. Use planning an ornament finish and the finisher checklist to agree that final stage.
Keep learning

Learning path
Your first needlepoint canvas: a learning path
Follow a linked beginner path from choosing a canvas and planning its finish to starting threads, stitching, and checking your first project.